
How to create your own Docker image
CloudCreating your own Docker images can go a long way to deploying more secure containers. Jack Wallen shows you how with just a few quick commands.
Image: Jack Wallen
We’ve talked so much about Docker, Kubernetes, and how containerized applications are the future of technology. Thing is, this relatively new type of IT management must begin with an image and, as they say, image is everything.
Of course, by image we’re talking about a read-only template that contains a set of instructions for creating a container that can be then deployed to a Docker Swarm or Kubernetes Cluster. Without those images, it would be a challenge to develop any applications to be deployed as services.
You can download all the images you want from the likes of DockerHub where you’ll find images to do just about everything under the sun. The big question is: Can you always trust those images? For any business, that question of trust is huge. So, instead of using someone else’s image for your cloud-based application or service, why not build your own? You can take a base image, such as a basic NGINX image, add whatever you need, and roll your own.
Let me show you how.
SEE: Implementing DevOps: A guide for IT pros (free PDF) (TechRepublic)
What you’ll need
The only thing you’ll need to make this work is a machine that supports the docker command. I’ll be demonstrating on Ubuntu Server 18.04, but so long as your platform can run the docker command, you should be able to do this from your operating system of choice.
How to install Docker
On the off chance your machine doesn’t already have Docker installed, let me show you how. Remember, I’m demonstrating on Linux, so you’ll have to modify the installation to fit your platform.
To install Docker on Ubuntu, log in to your server and issue the command:
sudo apt-get install docker.io -y
Once the installation completes, add your user to the docker group with the command:
sudo usermod -aG docker $USER
To finalize the change, issue the command:
newgrp docker
How to create the base container
The first thing we’ll do is create a base container for which we’ll build our custom image from. We’ll use the alpine:nginx image for this and deploy it with the command:
docker create --name nginx-base -p 80:80 nginx:alpine
You can now start the container with the command:
docker start nginx-base
Point a browser to http://SERVER_IP (where SERVER_IP is the IP address of the server hosting Docker) and you’ll see the tried and true NGINX welcome page (Figure A).
Figure A
Our NGINX container is running and accepting traffic.
” data-credit rel=”noopener noreferrer nofollow”> Our NGINX container is running and accepting traffic.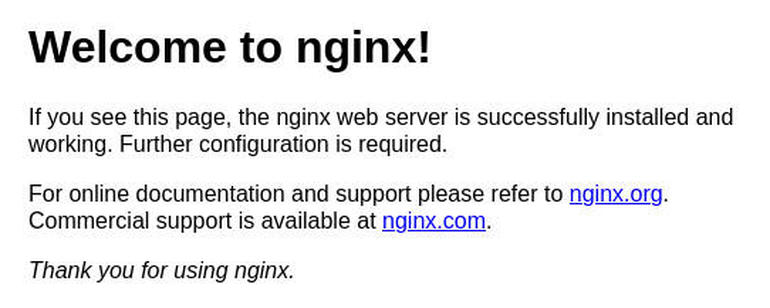
How to modify a running container
Now that our container is running, we can modify it. Let’s change the welcome screen to one that says, “Hello, Techrepublic!” To do that, we first need to create a new index.html file. Issue the command:
nano index.html
In that file, paste the following contents:
<html>
<head>
<title>Hello, TechRepublic!</title>
</head>
<body>
<h2>Hello, TechRepublic!</h2>
This is our new welcome page for our NGINX container.
</body>
Save and close the file.
We can now copy the index.html into the running container with the command:
docker cp index.html nginx-base:/usr/share/nginx/html/index.html
What that command does is replace the original index.html file in the running container with our new one. You can then point your browser to the same address and see the new file on display (Figure B).
Figure B
Hello, TechRepublic! has replaced the standard welcome page.
” data-credit rel=”noopener noreferrer nofollow”> Hello, TechRepublic! has replaced the standard welcome page.
How to create an image from the running container
Now, we’ll create a new image based on the current running container (with our new index.html file). To do this, we’ll commit the changes to the current container with the command:
docker commit nginx-base
The above command will create a new nameless, tagless image. You can see that image by issuing the command:
docker images
From this, you’ll see the new, tagless image (Figure C).
Figure C
Our new image has been created.
” data-credit rel=”noopener noreferrer nofollow”> Our new image has been created. 
How to tag the new image
We need to now add a repository tag for our image. This is done so the image can be pulled from either your local repository or even from Docker Hub. To tag an image, you first have to know the ID of the image. When you issued the docker images command earlier, it will list the ID in the IMAGE ID column.
As you can see, in my example, the ID is a91937f43275. To tag the image, we only need to use the first four characters in that ID. So let’s tag the image with the command:
docker tag a919 techrepublic-nginx
Now, if we issue the docker images command, we’ll see the image listed with the new tags (Figure D).
Figure D
Our tags have been added to the new container.
” data-credit rel=”noopener noreferrer nofollow”> Our tags have been added to the new container.
How to stop and delete the original container
At this point, we have a brand new image to use for our containers. Although it might not be anything truly useful, it demonstrates how easy it is to create a new image based on another. But before we can deploy a container based on the new image, we’ll want to delete the original. To do that, first stop the original container with the command:
docker stop nginx-base
Delete that container with the command:
docker rm nginx-base
We can finally deploy a new container, based our our new image, with the command:
docker run --name techrepublic -d -p 80:80 techrepublic-nginx
If we point our browser to the same URL as we did above, we should see the “Hello, Techrepublic!” message printed out. Any time you deploy a container based on the newly tagged techrepublic-nginx image, it will include those changes.
Congratulations, you’ve built your first Docker image by using just a few quick and easy commands. Although this example is quite rudimentary, you can build on it and create more and more complex images. Anyone who depends upon containers for their business might prefer to roll their own images instead of depending on third-party sources. Just make sure the images you use to create your own are trusted.

Cloud and Everything as a Service Newsletter
This is your go-to resource for XaaS, AWS, Microsoft Azure, Google Cloud Platform, cloud engineering jobs, and cloud security news and tips. Delivered Mondays