
Setting up Wireguard for AWS VPC Access
CloudSeeking more streamlined access to AWS EC2 instances on private subnets, I recently implemented Wireguard for VPN access. Wireguard, if you’re not familiar, is a relatively new solution that is baked into recent Linux kernels. (There is also support for other OSes.) In this post, I’ll share what I learned in setting up Wireguard for VPN access to my AWS environments.
Since the configuration of the clients and the servers is largely the same (especially since both client and server are Linux), I haven’t separated out the two configurations. At a high level, the process looks like this:
- Installing any necessary packages/software
- Generating Wireguard private and public keys
- Modifying the AWS environment to allow Wireguard traffic
- Setting up the Wireguard interface(s)
- Activating the VPN
The first thing to do, naturally, is install the necessary software.
Installing Packages/Software
On recent versions of Linux—I’m using Fedora (32 and 33) and Ubuntu 20.04—kernel support for Wireguard ships with the distribution. All that’s needed is to install the necessary userspace tools.
On Fedora, that’s done with dnf install wireguard-tools. On Ubuntu, the command is apt install wireguard-tools. (You can also install the wireguard meta-package, if you’d prefer.) Apple’s macOS, for example, has a Wireguard app on the Mac App Store.
This page on the Wireguard site has full instructions for a variety of operating systems. macOS, for example, has an app in the App Store for Wireguard support.
Once the necessary Wireguard software is installed, then it’s time to start with the configuration of Wireguard. From here forward, I’ll focus only on Linux, as the instructions will vary fairly widely from OS to OS.
Generating Private and Public Keys
This step must be done on both sides of the connection. The installation of the “wireguard-tools” package provided a wg binary that you can use to generate the necessary keys. The steps below will generate a public and private key for you.
- Become root using
sudo su -. - Switch to the
/etc/wireguarddirectory. - Run
wg genkey | tee privatekey | wg pubkey > publickey. This creates the public and private keys used by Wireguard.
With the public keys now generated, you’re ready to move on to setting up the Wireguard interfaces.
Modifying the AWS Environment
By default, Wireguard uses UDP port 51280 as the listening port for the Wireguard interface. If you want or need to use multiple Wireguard interfaces, you’ll need either separate network interfaces or use multiple ports. Modify the security group(s) to allow UDP port 51280 to the instance(s) that will have defined Wireguard interfaces.
Additionally, if you are going to route traffic through the VPN instance instead of masquerade traffic (use network address translation), then you’ll need to disable the source/destination check for the VPN instance. This can be accomplished fairly easily using the AWS CLI:
aws ec2 modify-instance-attribute --no-source-dest-check --instance-id <instance-id>
Setting up the Wireguard Interfaces
There are a couple different ways (at least) to set up the Wireguard interfaces. I’ll show you how to do it from the terminal with a configuration file (suitable for a headless server running in AWS) and how to do it from the GNOME user interface (an approach well-suited for a workstation being used to access resources in AWS).
Using a Configuration File from the CLI
Most of the Wireguard tutorials I saw focused only on this approach, so you’re likely to find other articles out there that share similar (or the same) information.
To set up a Wireguard interface using a configuration file from the CLI, create a wg<X>.conf file in /etc/wireguard, where <X> is the number of the interface. Typically you’d start with wg0 for the first VPN interface, but I’m not aware of any requirement to start with wg0. In this file, place the following contents:
[Interface]
PrivateKey = <private key for this machine>
Address = <IP address for Wireguard interface>
PostUp = iptables -A FORWARD -i wg0 -j ACCEPT; iptables -t nat -A POSTROUTING -o eth0 -j MASQUERADE
PostDown = iptables -D FORWARD -i wg0 -j ACCEPT; iptables -t nat -D POSTROUTING -o eth0 -j MASQUERADE
ListenPort = 51280 [Peer]
PublicKey = <public key for peer machine>
AllowedIPs = <IP address for peer Wireguard interface>, <additional CIDRs>
PersistentKeepalive = 25
There are a few notes I want to make about this configuration file:
- With regard to the IP address: you’ll have to decide whether all your Wireguard peers will share a common subnet, or whether you’ll have separate interfaces (and therefore separate subnets) for each peer. There are pros and cons to each approach. I decided to go with a common subnet among peers.
- If you used an interface name other than
wg0, be sure to adjust thePostUpandPostDownlines accordingly. Note that this configuration uses NAT to make the VPN traffic appear to the rest of the VPC as if it’s coming from the VPN instance; this avoids the need for disabling the source/destination check or updating routing tables. - Because my client devices are behind a NAT, I included the
PersistentKeepalivesetting. You may not need this (but I suspect many people will). - With regard to the
<additional CIDRs>notation above: if you want other IP addresses from the peer’s network to be able to route through this connection, specify those addresses/networks here. This is perhaps more important on the “client” side configuration, where you’re funneling all traffic for a VPC (or group of VPCs) through a single Wireguard node. - You’ll need a separate
[Peer]section for each VPN peer. In my case, I had three different systems from which I wanted VPN access, so there needed to be three separate[Peer]sections.
Once the interface is configured, then you can activate the interface using wg-quick up wg0 (or whatever interface name you’re using).
Using the GNOME User Interface
Using the CLI to configure the Wireguard interface(s) on a server is acceptable, especially in a use case like mine (establishing connectivity to EC2 instances). From the desktop, however, users may prefer using a graphical tool instead of the CLI. In this section, I’ll show what it looks like to use the GNOME Network Connections applet to configure your Wireguard interface(s).
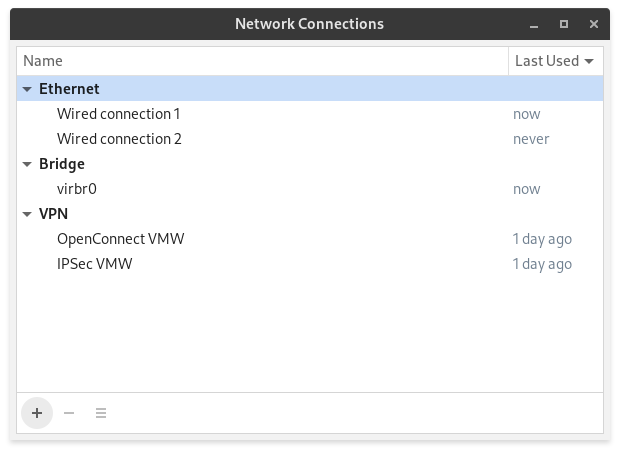
First, you’d run nm-connection-editor to launch the GNOME Network Connections applet, which would look something like this (you’d have different connections with different names, naturally):
Clicking on the + symbol in the lower left corner of the window will bring up a dialog to select the type of connection to add:
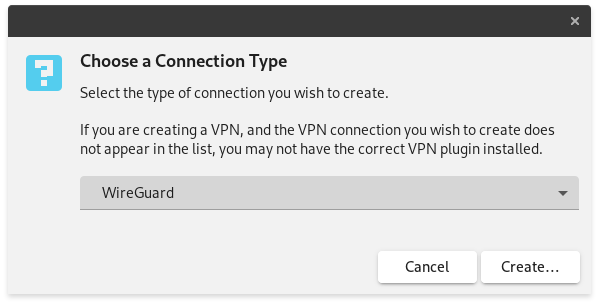
Selecting “Wireguard” from this dialog and clicking “Create…” brings up the Wireguard page for the new connection:
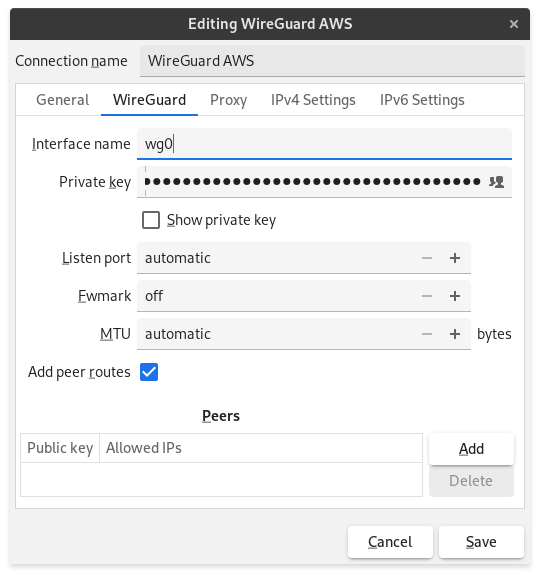
On this page, you’ll need to supply the following bits of information:
- An interface name (like
wg0orwg1) - The private key generated earlier
- Check the “Add peer routes” to have the routing table updated with routes from this connection
- Peer information
Click on “Add” under Peers to add a peer connection with this dialog box:
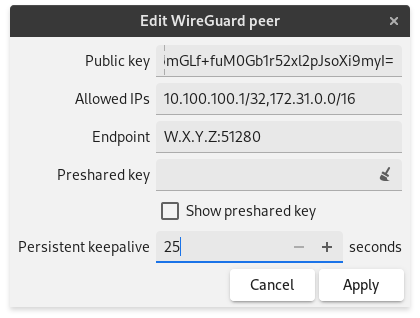
Here you’ll need to provide:
- The public key for the peer that was generated earlier.
- The IP addresses and address ranges that will be routed across this connection. As you can see in the screenshot above, for “Allowed IPs” you’ll want to not only specify the IP address of the peer Wireguard interface but also the IP range of the VPC behind the VPN gateway.
- The endpoint (IP address and port) for the VPN gateway. As mentioned earlier, make sure this traffic is allowed through security groups, Network Access Control Lists, and other network traffic controls.
- You can also set the persistent keepalive interval.
Click “Apply” to commit the changes to the peer configuration. You can use the “Add” button again to add additional properties.png
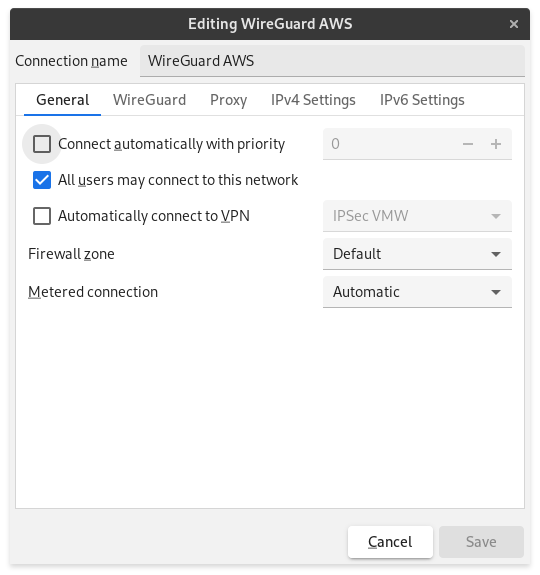
If you want the VPN connection to come up automatically, flip over to the General page and check “Connect automatically with priority”:
The last thing to do is assign an IP address to the interface, which is done via the “IPv4 Settings” and/or the “IPv6 Settings” pages. Here’s the “IPv4 Settings” page:

The IP address you assign needs to be on the same subnet as the IP address given to/specified for the peer. As I mentioned earlier, this could be a common subnet (like a /29 or similar) among all the Wireguard peers, or it could be a separate subnet for each peer. Fill in the other sections as needed.
Click “Save” whenever you’re finished, and your new Wireguard VPN connection should be good to go!
Activating the VPN
After the interfaces have been activated, the VPN connection(s) are automatically active. No additional steps are necessary to establish the VPN connections; the peer interfaces defined on each end automatically negotiate a connection among themselves. You should be able to almost immediately start accessing resources in the remote VPC.
I hope this write-up proves useful to someone out there. If you have any questions, or if you feel something I’ve written is incorrect or inaccurate, please contact me on Twitter. Thanks for reading!
![]() …
…


