
Using WireGuard on macOS
CloudA short while ago I published a post on setting up WireGuard for AWS VPC access. In that post, I focused on the use of Linux on both the server side (on an EC2 instance in your AWS VPC) as well as on the client side (using the GNOME Network Manager interface). However, WireGuard is not limited to Linux, and I recently configured one of my macOS systems to take advantage of this WireGuard infrastructure for access to the private subnets in my AWS VPC. In this post, I’ll walk readers through configuring macOS to use WireGuard.
The first step is installing WireGuard on macOS. This is remarkably easy; just go to the App Store and install the WireGuard app for macOS. (Hopefully this link will take you directly there if you’re on a macOS-based system.)
Once the app is installed, the next step is to configure the WireGuard tunnels. I found this to be a bit confusing at first, but only because I wasn’t clear on the relationship between the WireGuard app and the Network pane in System Preferences. In this case, you need to use the WireGuard app to create the tunnels, which will show up as connections (interfaces) in the Network pane of System Preferences.
Running the WireGuard app will put an icon on your menu bar, and should bring up the “Manage WireGuard Tunnels” window. If not, select “Manage Tunnels” from the WireGuard menu icon; this will open the “Manage WireGuard Tunnels” window. From there, you can select the small plus in the lower left corner and select “Add Empty Tunnel…” from the menu. This displays a dialog box something like this:
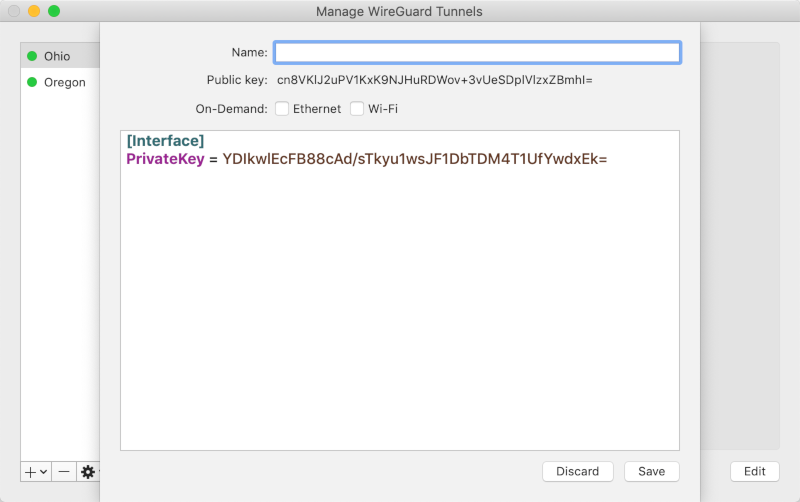
This will automatically create a new set of public and private keys, and auto-populate the start of a new WireGuard interface configuration. (Don’t worry; these keys aren’t valid for any interfaces/connections.) It’s up to you to finish the configuration by adding directives such as Endpoint, AllowedIPs, and Address. It’s an interesting sort of mismatch to have such a well-designed graphical application, but not provide any guidance or structure to the user on how to configure the interface/tunnel.
Ultimately, you’d need the configuration to look something like this:
[Interface]
PrivateKey = <some private key here>
Address = <IP address of WireGuard interface> [Peer]
PublicKey = <public key of WireGuard peer interface>
AllowedIPs = <IP addresses or CIDR ranges to be routed across the tunnel>
Endpoint = <peer endpoint IP and port>
If you’re behind a NAT, you may also want to add the PersistentKeepalive = 25 value to the configuration as well (see the “NAT and Firewall Traversal Persistence” section of this page). Next you’ll need to configure the peer with the appropriate configuration. If the peer is Linux-based, you can use the information in my earlier blog post; if the peer is macOS, then use the instructions in this post. For anything else, refer to the WireGuard web site.
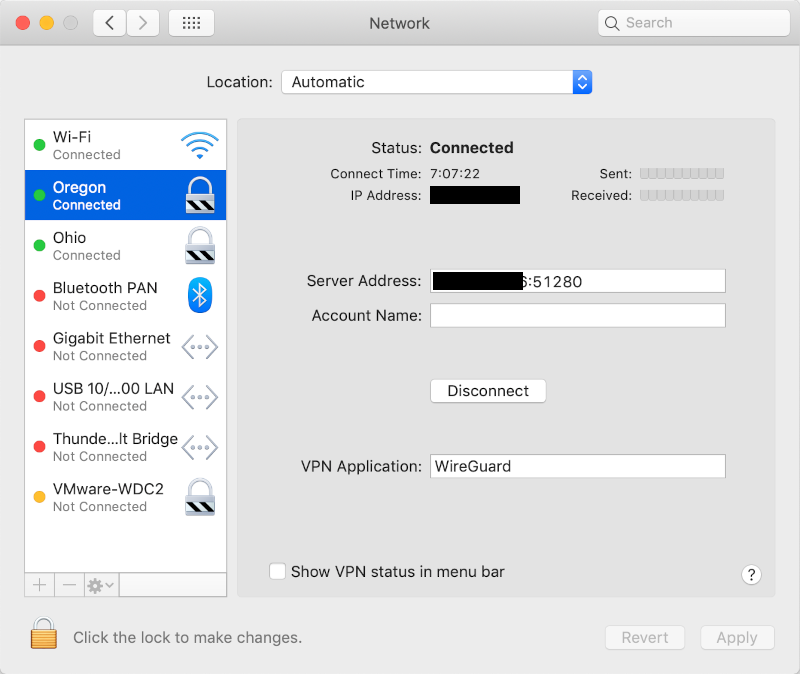
Once both sides of the connection are configured, then you should be able to activate the tunnel and start passing traffic. If traffic won’t pass successfully, then check the interface configuration on both sides, and make sure any firewalls along the path allow the traffic. The WireGuard connection will look like this in the Network pane of the System Preferences app (IP addresses have been blacked out):
Repeat this process to add more tunnels/connections; each of them will show up as a menu item in the WireGuard menu icon, and you can select them to activate/deactivate the connection. Also note that selecting the “On-Demand” option when creating the tunnel will let WireGuard automatically establish the tunnel when you start passing traffic (assuming both ends are configured).
I hope this information helps. I found the interface to be a bit unintuitive, but after working with it for a little while it doesn’t feel so awkward now. Hopefully this walkthrough will make getting WireGuard set up and configured on macOS a bit easier for others. Thanks for reading, and hit me on Twitter if you have any questions, comments, or other feedback!
![]() …
…


